


If you're planning a wedding on a tight budget, fret not! With a little creativity and effort, you can make your special day look stunning without breaking the bank. These 10 easy DIY decor projects will add a personal touch and save you money at the same time.
First up, why not transform regular mason jars into elegant centerpieces? All you need is some spray paint, glue, and a few flowers. Check out a tutorial online to create the perfect look for your special day.
A photo booth is a fun way to capture memories with your guests. Make a personalized backdrop using materials like streamers or tassels. Go the extra mile and create a floral wall with silk flowers or a backdrop with hanging frames featuring pictures of you and your significant other.
Custom signs are a great way to add a personal touch to your wedding. Create signs with your favorite quotes or phrases, or display the order of events for your guests to follow. You can also showcase your relationship using a photo display sign.
Table numbers don't have to be boring! Use stencils to paint custom numbers onto wood blocks. If you're going for a rustic theme, this is the perfect touch. And to create a romantic ambiance, make candle holders using empty wine bottles. Simply remove the labels, add some glitter or paint, and place tea lights inside.
Finally, why not make boho-inspired flower crowns for you and your bridal party? You can choose your favorite flowers and colors to create a unique look that will make you feel like a fairytale princess.
These DIY decor projects are not only budget-friendly but they're also a great way to add a personal touch to your special day. So roll up your sleeves and get crafting!
Mason Jar Centerpieces
When it comes to wedding decorations, centerpieces can make a big impact on the overall feel of the event. Creating your own centerpieces is a great way to save money and add a personal touch to your wedding. Mason jars are a versatile item that can be transformed into elegant centerpieces with just a few simple steps.
To create your own mason jar centerpieces, you'll need a few supplies. First, choose the size of your mason jars based on your preferences and the size of your tables. You'll also need spray paint in your desired color, small flowers or greenery, and twine or ribbon to tie around the jars.
The first step is to thoroughly clean your mason jars and remove any labels or glue residue. Once they are dry, place them on a flat surface and spray paint them in your desired color. Consider using metallic paint for an extra touch of elegance.
after the paint has dried, you can add your flowers or greenery to the jars. Choose small blooms that will fit comfortably inside the jar and enhance the color of your paint. Tie a piece of twine or ribbon around the neck of the jar to complete the look.
If you're looking for a way to add even more personality to your centerpieces, consider filling the jars with objects that represent you and your significant other. This could include photos, seashells, or other meaningful items.
- Choose the size of your mason jars
- Spray paint them in your desired color
- Add small flowers or greenery to the jars
- Tie a piece of twine or ribbon around the neck of the jar to complete the look
- Consider filling the jars with objects that represent you and your significant other
Overall, creating your own mason jar centerpieces is a simple and cost-effective way to add a personal touch to your wedding decorations. With a few supplies and a little creativity, you can transform these versatile jars into elegant centerpieces that will impress your guests.
Photo Booth Backdrop
One of the most popular wedding trends is creating a photo booth for guests to take pictures during the reception. Creating a personalized backdrop can add the perfect touch to make your photo booth stand out.
To create a DIY photo backdrop, start with a blank canvas such as a large piece of fabric or a blank wall. From there, you can add your own personal touch by incorporating different materials and decorations.
- Hang a variety of picture frames
- Add paper flowers or garlands
- Incorporate string lights or fairy lights
- Create a balloon arch
- Hang strands of colorful ribbon
You can also incorporate a theme or color scheme into the backdrop to match the overall wedding decor. For example, if your wedding has a vintage theme, you could use lace or burlap to create a rustic backdrop. If your wedding colors are blue and white, incorporate those colors into the backdrop with paper flowers or balloons.
Creating a fun and personalized backdrop for your wedding photo booth is a great way to add a unique and memorable touch to your special day. By using some simple materials and a little creativity, you can create a backdrop that will impress your guests and provide a fun photo opportunity for everyone.
Floral Wall
A beautiful floral wall can add a romantic touch to your wedding ceremony or reception. And the good news is that you can easily create one with silk flowers and a few supplies from your local craft store. Here's how:
- First, choose the color scheme that matches with your wedding theme. Silk flowers come in a variety of colors, so you can easily find the ones that complement your wedding colors.
- Next, you'll need a backdrop frame to attach the flowers to. You can make a frame yourself using PVC pipes or purchase one from a local hardware store.
- Attach a piece of chicken wire or floral netting to the frame to create a base for the flowers to stick to.
- After that, start attaching the silk flowers to the chicken wire or floral netting using floral wire or hot glue. You can arrange the flowers according to the color scheme you've chosen, or create a botanical-inspired design with a mix of different flower types.
- Finally, add some finishing touches, such as greenery or ribbon, to complete the look.
A floral wall creates a stunning backdrop for your wedding photos, and you can reuse it for other events or home decor after your big day. Plus, creating a floral wall yourself is a great way to save money while adding a personal touch to your wedding decor.
Backdrop with Hanging Frames
If you're looking for a romantic and personalized backdrop for your wedding, hanging frames with pictures of you and your significant other is the perfect DIY project. This backdrop will not only give your guests a glimpse into your relationship, but it also creates a beautiful and intimate setting for your special day.
To start this project, you'll need to gather a collection of frames in different sizes and styles. Thrift stores and garage sales are great places to find inexpensive frames. Once you have your frames, select pictures of you and your partner that you would like to display. You can choose pictures from throughout your relationship or stick to a specific theme, like vacation photos or engagement photos.
Next, you'll want to arrange the frames in a layout that works best for your space. Consider creating a grid pattern, diagonal rows, or a cascading effect. You can use string or ribbon to hang the frames from a curtain rod or another sturdy object. Be sure to measure and mark where each frame should hang before you start hanging them.
If you want to add an extra touch of personalization, you could also consider adding flowers or greenery to the frames. You can weave dried flowers or twine around the frames or attach small vases to them to hold fresh flowers. This added touch will make your backdrop even more unique and special.
Overall, creating a backdrop with hanging frames is a simple and cost-effective DIY project that will add a romantic and personal touch to your wedding day. Your guests will love seeing your love story displayed and you'll have a beautiful backdrop for your wedding photos. So, gather your frames and pictures and get ready to create the perfect backdrop for your special day.
Wedding Signs
If you're looking to add a personal touch to your wedding decor, creating your own custom signs is an easy and budget-friendly way to do so. Here are a few ideas for wedding signs:
- Directional signs: Create signs with arrows pointing the way to the ceremony, reception, and other important locations at the venue. You can use chalkboards, wood panels, or any other material that matches your wedding theme.
- Seating signs: Help your guests find their seats with personalized seating signs. Include the guest's name and table number on each sign.
- Welcome sign: Greet your guests with a custom welcome sign that displays your names and the date of your wedding. This is the perfect way to set the tone for your special day.
You can create your signs by using stencils, chalkboard paint, or printing them out on cardstock and framing them. Consider using different fonts and colors to match your wedding theme and style. And don't forget to add a personal touch with a quote or message that reflects you and your partner's love story.
By creating your own wedding signs, you can add a unique and personalized touch to your wedding decor without breaking the bank. Guests will appreciate the thought and effort you put into making your special day truly one-of-a-kind.
Program Sign
If you want your guests to know what's happening and when at your wedding, creating a program sign is a great idea. The program sign can display the schedule of events, including the ceremony, reception, and any other important activities that will take place on your special day.
To create a program sign, you'll need supplies such as a wooden board, paint, paintbrushes, stencils, and markers. First, paint the wooden board in a color that complements your wedding theme. Once the paint has dried, use stencils to add titles for each section of the program, such as “Ceremony,” “Reception,” and “Dinner.”
Next, use markers to fill in the details for each section of the program. You can include the start time for each activity, the names of the people involved, and any other relevant information. To make it easier for guests to read, consider using bullet points or tables to organize the information on the sign.
Finally, add any decorative touches that you like, such as flowers, ribbons, or other embellishments. Once you're happy with the design of your program sign, you can display it in a prominent location at your wedding venue, so that guests can refer to it throughout the day.
Creating a program sign is a simple DIY project that can add a lot of value to your wedding. By keeping your guests informed about what's happening and when, you'll ensure that everyone has a great time and doesn't miss any important moments. Plus, the sign itself can serve as a beautiful decoration and a cherished keepsake of your special day.
Photo Display Sign
Looking for a unique and personalized way to showcase your love story at your wedding? A photo display sign is the perfect DIY project for you!
Start by gathering photos of you and your significant other that tell your love story. These can be old photos, recent photos, or a mix of both. Choose photos that showcase special moments, milestones, and memories. Once you have your photos, you can start creating your sign.
Materials needed:
- Wooden board
- Paint
- Paintbrushes
- Mod Podge
- Printed photos
- Decorative elements (optional)
- Sawtooth hangers
Step 1: Paint your wooden board in your desired color. Let dry.
Step 2: Arrange your printed photos on the board. Play around with the layout until you find a configuration that you like.
Step 3: Using Mod Podge, secure your photos to the board. Be sure to smooth out any bubbles or wrinkles.
Step 4: Once your photos are secured, you can add any decorative elements you desire. This could be anything from additional paint, to glitter, to stickers, to faux flowers.
Step 5: Once your sign is complete, attach sawtooth hangers to the back so you can hang it up at your wedding. Alternatively, you can prop it up on an easel or display it on a table.
A photo display sign is a great way to reminisce on your love story and share it with your guests. Plus, it's a personal and budget-friendly alternative to expensive wedding decor. Give it a try and see how your guests react to your creative and unique DIY project!
Table Numbers
If you're looking for a unique touch to add to your wedding decor, creating your own table numbers is a great project! All you need is some wood, paint, and stencils to make rustic, personalized numbers that match your wedding theme.
To get started, gather your supplies. You'll need wooden blocks or dowels, acrylic paint, brushes, and number stencils. If you don't have access to stencils, you can print out numbers in a font you like and use them as a guide to paint your own.
First, sand the wooden blocks or dowels to ensure a smooth surface for painting. Then, paint the numbers onto the wood using your stencils or guide. You can choose to paint them in your wedding colors or a neutral tone like white or black.
Once the paint has dried, you can add some extra rustic flair by distressing the edges of the wooden blocks with sandpaper. You can also add a layer of clear polyurethane to protect them from wear and tear.
To display your table numbers at the reception, you can place them in small holders like mini picture frames or wire holders. You can also keep them simple and just prop them up against your centerpieces.
Not only is making your own table numbers a fun and easy DIY project, but it also adds a personal touch to your wedding decor. Plus, you can keep them as a sentimental reminder of your special day for years to come.
Candle Holders
Creating elegant candle holders using empty wine bottles is a great way to add a romantic touch to your wedding table setting. It's also an environmentally friendly option to repurpose old bottles instead of buying new candle holders.
To start, gather empty wine bottles and remove any labels. Next, paint the bottles with a coat of white paint and let them dry completely. Once dry, wrap a piece of twine around the neck of the bottle a few times and tie it in a knot to add a rustic touch.
Now it's time to add the candles. You can choose to use taper candles or tea lights, depending on the size of the bottle opening. Insert the candles and light them up for a warm and romantic glow.
If you want to add some extra decoration, you can also tie a small sprig of greenery or a flower around the twine. It will add a pop of color and tie in with your overall wedding theme.
Not only are these candle holders easy to make, but they also make for a great “do it yourself” project for your bridal party. Get creative and have fun personalizing each bottle to fit your unique style.
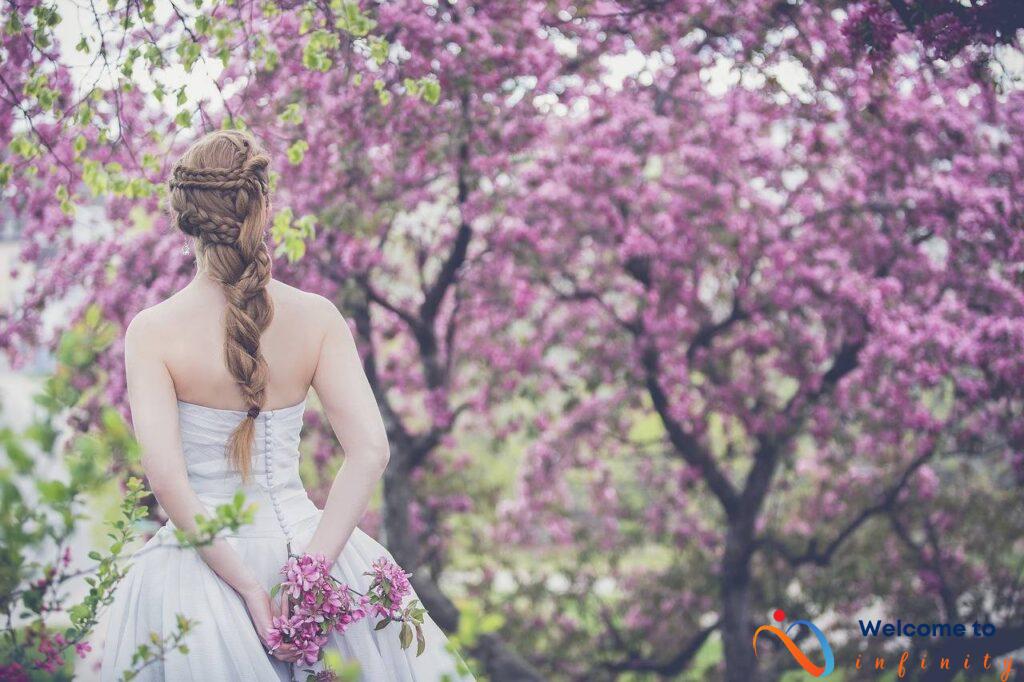
Flower Crowns
If you're having a boho-inspired wedding, complete your look with a DIY flower crown! It's an easy and affordable way to add a personal touch to your bridal outfit and make your party feel extra special. Here's how to make your own:
- Floral wire
- Floral tape
- Cut flowers of your choice (real or fake)
- Greenery (optional)
- Measure the floral wire around your head and cut it to size, leaving a few extra inches on each end to tie it together.
- Using the floral tape, wrap the wire tightly with it so that it's covered completely. This is especially important if you're using real flowers, as it will prevent the wire from cutting into them.
- Start adding your flowers to the crown by using small pieces of floral wire to attach them to the base. You can mix and match colors and sizes, or stick to one type of flower if you prefer.
- If you're using greenery, add it in between the flowers for a more natural and organic look.
- Continue adding flowers until you're happy with the arrangement. Remember to leave at least a few inches of wire at each end so that you can tie the crown together.
- When you're finished, tie the ends of the wire together tightly and use floral tape to cover any exposed wire.
Voila! Your boho-inspired flower crown is now ready to wear. You can make these for your bridesmaids as well or host a flower crown-making party as a fun pre-wedding activity. It's a great way to add a personal touch to your wedding and create memories that will last a lifetime.