Are you tired of your plain and boring bedroom? Want to update your space without spending a fortune? Look no further than these DIY headboard ideas that are both budget-friendly and stylish!
One of the easiest ways to add some charm to your bedroom is by creating a pallet headboard. Simply find a wooden pallet, sand it down, and add a coat of paint or stain to match your decor style. Or, for a cozy and personalized touch, try making a fabric-covered headboard using a piece of plywood and your favorite fabric.
If you're looking for a more luxurious feel, try making a tufted headboard. This can easily be achieved by following a few simple steps and the addition of some foam padding and fabric. Taking it a step further, add buttons to create a classic button-tufted look or channel your inner designer and create a diamond-tufted headboard.
For a unique and bohemian-inspired vibe, create a woven headboard using materials like rope or ribbon. Or, make a statement with a bold and bright wallpapered headboard. A stenciled headboard is another great option that allows you to customize your design.
And finally, for those who like to switch things up, try painting a chalkboard headboard. This fun DIY project allows you to doodle and change up the design whenever you feel like it!
No matter what your style or skill level, these DIY headboard ideas will inspire you to get creative and upgrade your bedroom without breaking the bank.
Pallet Headboard
If you're looking to add some personality and charm to your bedroom without spending a lot of money, a pallet headboard might be just what you need. Not only is this DIY project budget-friendly, but it's also eco-friendly since you're repurposing an old wooden pallet.
To make a pallet headboard, start by sourcing a pallet from a local hardware store or a friend. Once you have your pallet, sand it down to remove any rough edges or splinters. You may also want to paint or stain the pallet to match your bedroom's color scheme.
Next, mount the pallet onto the wall behind your bed using L-shaped brackets. Make sure the brackets are securely attached to both the wall and the pallet to avoid any accidents. You can also add some extra support by attaching a 2×4 to the wall and then mounting the pallet on top of it.
For some extra flair, you can add some string lights or fairy lights to the back of the pallet to create a cozy vibe. You can also decorate the headboard with some plants or photos to make it feel more personal.
Overall, a pallet headboard is a simple and stylish DIY project that anyone can do with just a little bit of skill and effort. Not only will it add some rustic charm to your bedroom, but it will also save you money compared to buying a pre-made headboard from a store.
Fabric-Covered Headboard
Are you looking for a way to add a personal touch to your bedroom without spending a lot of money? Then a DIY fabric-covered headboard might be just what you need! All you need is a piece of plywood, your favorite fabric, and a few other materials to create a cozy and custom headboard that will perfectly fit your personal style.
To start, measure the width of your bed and cut your plywood to match. Then, cut your fabric to cover the plywood, leaving a few extra inches on each side. You can choose any fabric that matches your decor or personality. For a cozy look, consider using a soft flannel or plush velvet fabric.
Next, attach your fabric to the plywood using a staple gun. Begin by stapling the center of the top edge of the fabric to the center of the top of the board. Then, stretch the fabric taut and staple the center of the bottom edge in the same way. Continue in this way along the sides, first the center, then the edges until everything is secure and taut.
If you want a little extra detail, you can add trim or nailhead trim to the edges of the headboard. You can also add additional padding to create a tufted headboard. Simply cut foam to size, cover with batting, and staple down before stapling on the fabric. Alternatively, you could add button detailing with the use of a buttons kit.
Creating a fabric-covered headboard is a great DIY project that will give your bedroom an instant makeover. Plus, it's a budget-friendly option that you can easily customize to match your style. So why not give it a try and see how it can transform your space!
Tufted Headboard
If you want to add a touch of luxury to your bedroom without breaking the bank, a tufted headboard is the perfect solution! While pre-made tufted headboards can be expensive, you can easily create your own with a few supplies and a little bit of DIY skill.
First, you'll need to create the base for your headboard. This can be done by using a piece of plywood or an old headboard as a base and covering it with foam padding and batting to create a soft surface for your tufting. Next, mark out where you want your tufts to go on the headboard.
Using a large needle and thread, push the needle through the foam and batting and pull it back out through the fabric, tying a knot to hold the thread in place. Repeat this process for each tuft you want to create. Once you've created all your tufts, your tufted headboard will look stunning and luxurious, but there's one more step you can take to make it look even better.
Adding buttons to your tufted headboard can take it to the next level of elegance and sophistication. Choose buttons that coordinate with your bedding or decor and sew them onto the headboard to finish the look. And there you have it – a beautiful tufted headboard that you made yourself for a fraction of the cost of a pre-made one!
Button-Tufted Headboard
If you want to add a touch of sophistication to your DIY tufted headboard, consider adding buttons to create a button-tufted headboard. This style is a classic and elegant look that is sure to impress anyone who sees it. To create this headboard, you will need a few extra materials like buttons and thread.
The first step is to decide on the placement of the buttons. You can opt for a symmetrical pattern or a randomly spaced design. Next, use a needle and thread to secure each button to the headboard. Thread the needle through the headboard and the button and secure it tightly. Make sure to keep the thread tight as you repeat the process with each button.
If you want to add a little bit more detail to your button-tufted headboard, you can consider using a contrasting thread color to sew the buttons on. This will create an eye-catching detail that is sure to impress anyone who sees it.
When selecting the buttons for your headboard, take some time to choose buttons that complement the color and style of your fabric. You can opt for a uniform look or mix and match different shapes and sizes to create a unique and personalized headboard.
Overall, a button-tufted headboard is a great way to elevate the look of your bedroom and create a classic and elegant focal point. With a little bit of creativity and DIY skills, you can easily create a unique headboard that reflects your personal style.
DIY Diamond-Tufted Headboard
A diamond-tufted headboard is a classic and elegant style that can elevate the look of any bedroom. The good news is, you don't have to spend a fortune to get the look. With just a few simple materials and some DIY skills, you can create your own DIY diamond-tufted headboard that looks like it came straight from a high-end furniture store.
To create your diamond-tufted headboard, you will need the following materials:
- Plywood
- Foam
- Batting
- Fabric
- Button cover kit
- Upholstery needle and thread
- Metal washers or button kits
- Hot glue gun
- Staple gun
First, begin by cutting your plywood to the desired shape and size of your headboard. Next, cut your foam and batting slightly larger than the plywood and use the staple gun to secure them to the board.
Then, cut your fabric to size and lay it over the batting. Use the staple gun to secure the fabric to the back of the headboard, pulling it taut as you go. Make sure to fold the corners neatly for a finished look.
To create the diamond tufting, mark where you want your buttons to be placed on the headboard. Using the upholstery needle and thread, pull the thread through the foam and batting, securing it with a metal washer or button kit on the back of the board.
To finish, cover the buttons with matching fabric using the button cover kit and hot glue gun. Continue the process of pulling the thread through the foam and batting, securing it with a metal washer or button kit, and covering the button until all of the tufts are complete.
And there you have it! Your very own DIY diamond-tufted headboard that looks like it belongs in a high-end furniture store. Not only is it budget-friendly, but it's also a unique and personalized addition to your bedroom decor.
Woven Headboard
If you're looking for a DIY headboard that is unique and bohemian-inspired, then the woven headboard is the perfect project for you. With just a few materials such as rope or ribbon, you can weave together a headboard that will take your bedroom decor to the next level.
To get started, you'll need a piece of plywood to use as the base of your headboard. Cut it to the right size for your bed and sand the edges smooth. Next, decide on the type of material you want to use to weave your headboard. You can use anything from rope to ribbon to even strips of fabric. Gather your materials and cut them into strips of equal length.
Using a staple gun, attach one end of your material to the back of the plywood. Then, stretch the material tightly across the front of the plywood and staple it to the back. Repeat this process until you've covered the entire plywood base with your woven material. You can alternate between different materials to create a unique pattern and texture, or stick to one material for a more uniform look.
Once you've finished weaving the headboard, trim any excess material and secure the edges with a staple gun. You can also add a frame around the edges of the headboard to give it a finished look. Hang it on the wall behind your bed and enjoy your one-of-a-kind woven headboard that adds texture and personality to your bedroom decor.
Wallpapered Headboard
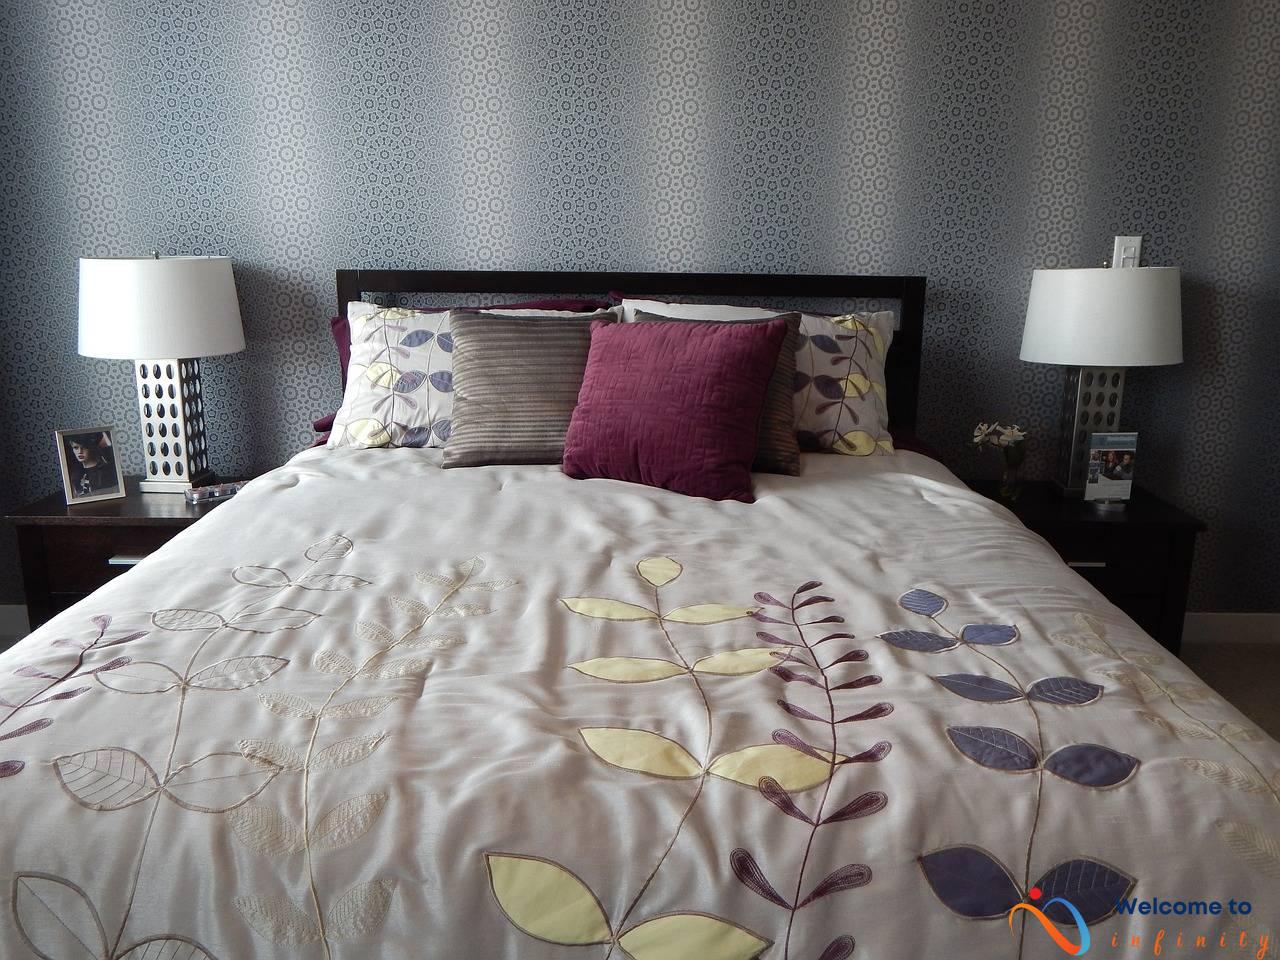
If you're looking for a way to add a pop of color and pattern to your bedroom, a wallpapered headboard is a great option. Not only is it budget-friendly, but it's also a fun and unique DIY project that can be customized to fit your personal style.
To create a wallpapered headboard, start by measuring the width of your bed frame and adding a few inches to either side to ensure that the headboard will be slightly wider than the bed. Cut a piece of plywood to the desired size and shape of your headboard, then sand the edges smooth.
Next, choose a bold and bright wallpaper that complements your existing bedding and decor. You can opt for a classic floral pattern, a geometric print, or even a whimsical design like polka dots or stripes.
Using a wallpaper paste and a wallpaper smoothing tool, apply the wallpaper to the plywood in sections, smoothing out any bubbles or wrinkles as you go. Once the entire headboard is covered in wallpaper, let it dry completely before attaching it to the wall behind your bed.
To attach the headboard, use brackets or screws to secure it directly to the wall, making sure it is level and centered above the bed. Lastly, add a few decorative pillows and blankets in coordinating colors to complete the look of your new statement-making headboard.
With a wallpapered headboard, you can easily transform the look of your bedroom without breaking the bank or committing to a permanent change. Plus, since you can easily switch out the wallpaper as often as you like, you can keep your headboard looking fresh and stylish for years to come.
Stenciled Headboard
A plain headboard can look dull and uninviting, but with a little creativity, it can become a stylish focal point in your bedroom. One easy way to achieve this is by using stencils to add a design or pattern to your headboard.
You can purchase pre-made stencils or create your own using a piece of cardboard or stencil sheet. Choose a design that speaks to you and matches the overall style of your bedroom. You can use paint to stencil the pattern onto the headboard, or try a more unconventional method like using a wood-burning tool for a unique, rustic look.
One great thing about stenciling is that you can easily change the design whenever you want. If you get tired of a particular pattern, simply paint over it and try a new one. This makes it a budget-friendly and versatile option for anyone looking to update their bedroom decor.
If you're not confident in your DIY skills or are worried about making mistakes, practice on a piece of scrap wood first before trying it on your actual headboard. And remember, the imperfections in a DIY project can often add character and charm to your finished product.
Incorporating stenciled designs into your headboard is just one way to get creative and add a personal touch to your bedroom. With a little bit of time and effort, you can transform a plain headboard into a stunning centerpiece that you'll love waking up to every morning.
Chalkboard Headboard
The chalkboard headboard is the perfect DIY project for those who love to change up their decor frequently. This headboard allows you to draw and write on it, creating a new design every day if you want. All you need is a headboard, some chalkboard paint, and a little bit of creativity.
Start by cleaning and sanding down the headboard to create a smooth surface for the paint to adhere to. Then, apply a coat of chalkboard paint using a brush or roller. Let the paint dry completely before adding a second coat.
Once the paint is dry, you can add your own designs or messages using chalk. Get creative and use different colors or patterns to make it unique. You can also erase your design and start fresh whenever you want to change it up.
A chalkboard headboard is not only functional and fun, but it also adds a unique and playful touch to your bedroom. It's also a great way to save money on buying a new headboard every time you want to switch up your decor.
- Materials needed:
- Headboard
- Chalkboard paint
- Paint brush or roller
- Sandpaper
- Chalk or chalk markers
In conclusion, the chalkboard headboard is a simple and budget-friendly DIY project that can add personality to any bedroom. Embrace your artistic side and have fun creating new designs and messages on your headboard. Plus, you can change it up as often as you like without breaking the bank.


